Annotation
Annotation in the context of Scene2Model means, that the imported haptic designs are annotated with additional information to provide a better description of the created idea. This includes adding information to the individual elements in the models or add additional elements to provide additional context.
Prerequisite:
- The model which should be annotated contains elements and is opened.
- To annotate
Scenemodels, theScene (annotation)view must be chosen, as described in choose scene view modes.
Describe Elements in a Model
To describe the elements in a model, the notebook is used. By double-clicking an element the notebook is opened, where the information can be entered. The picture below shows a picture of a notebook:
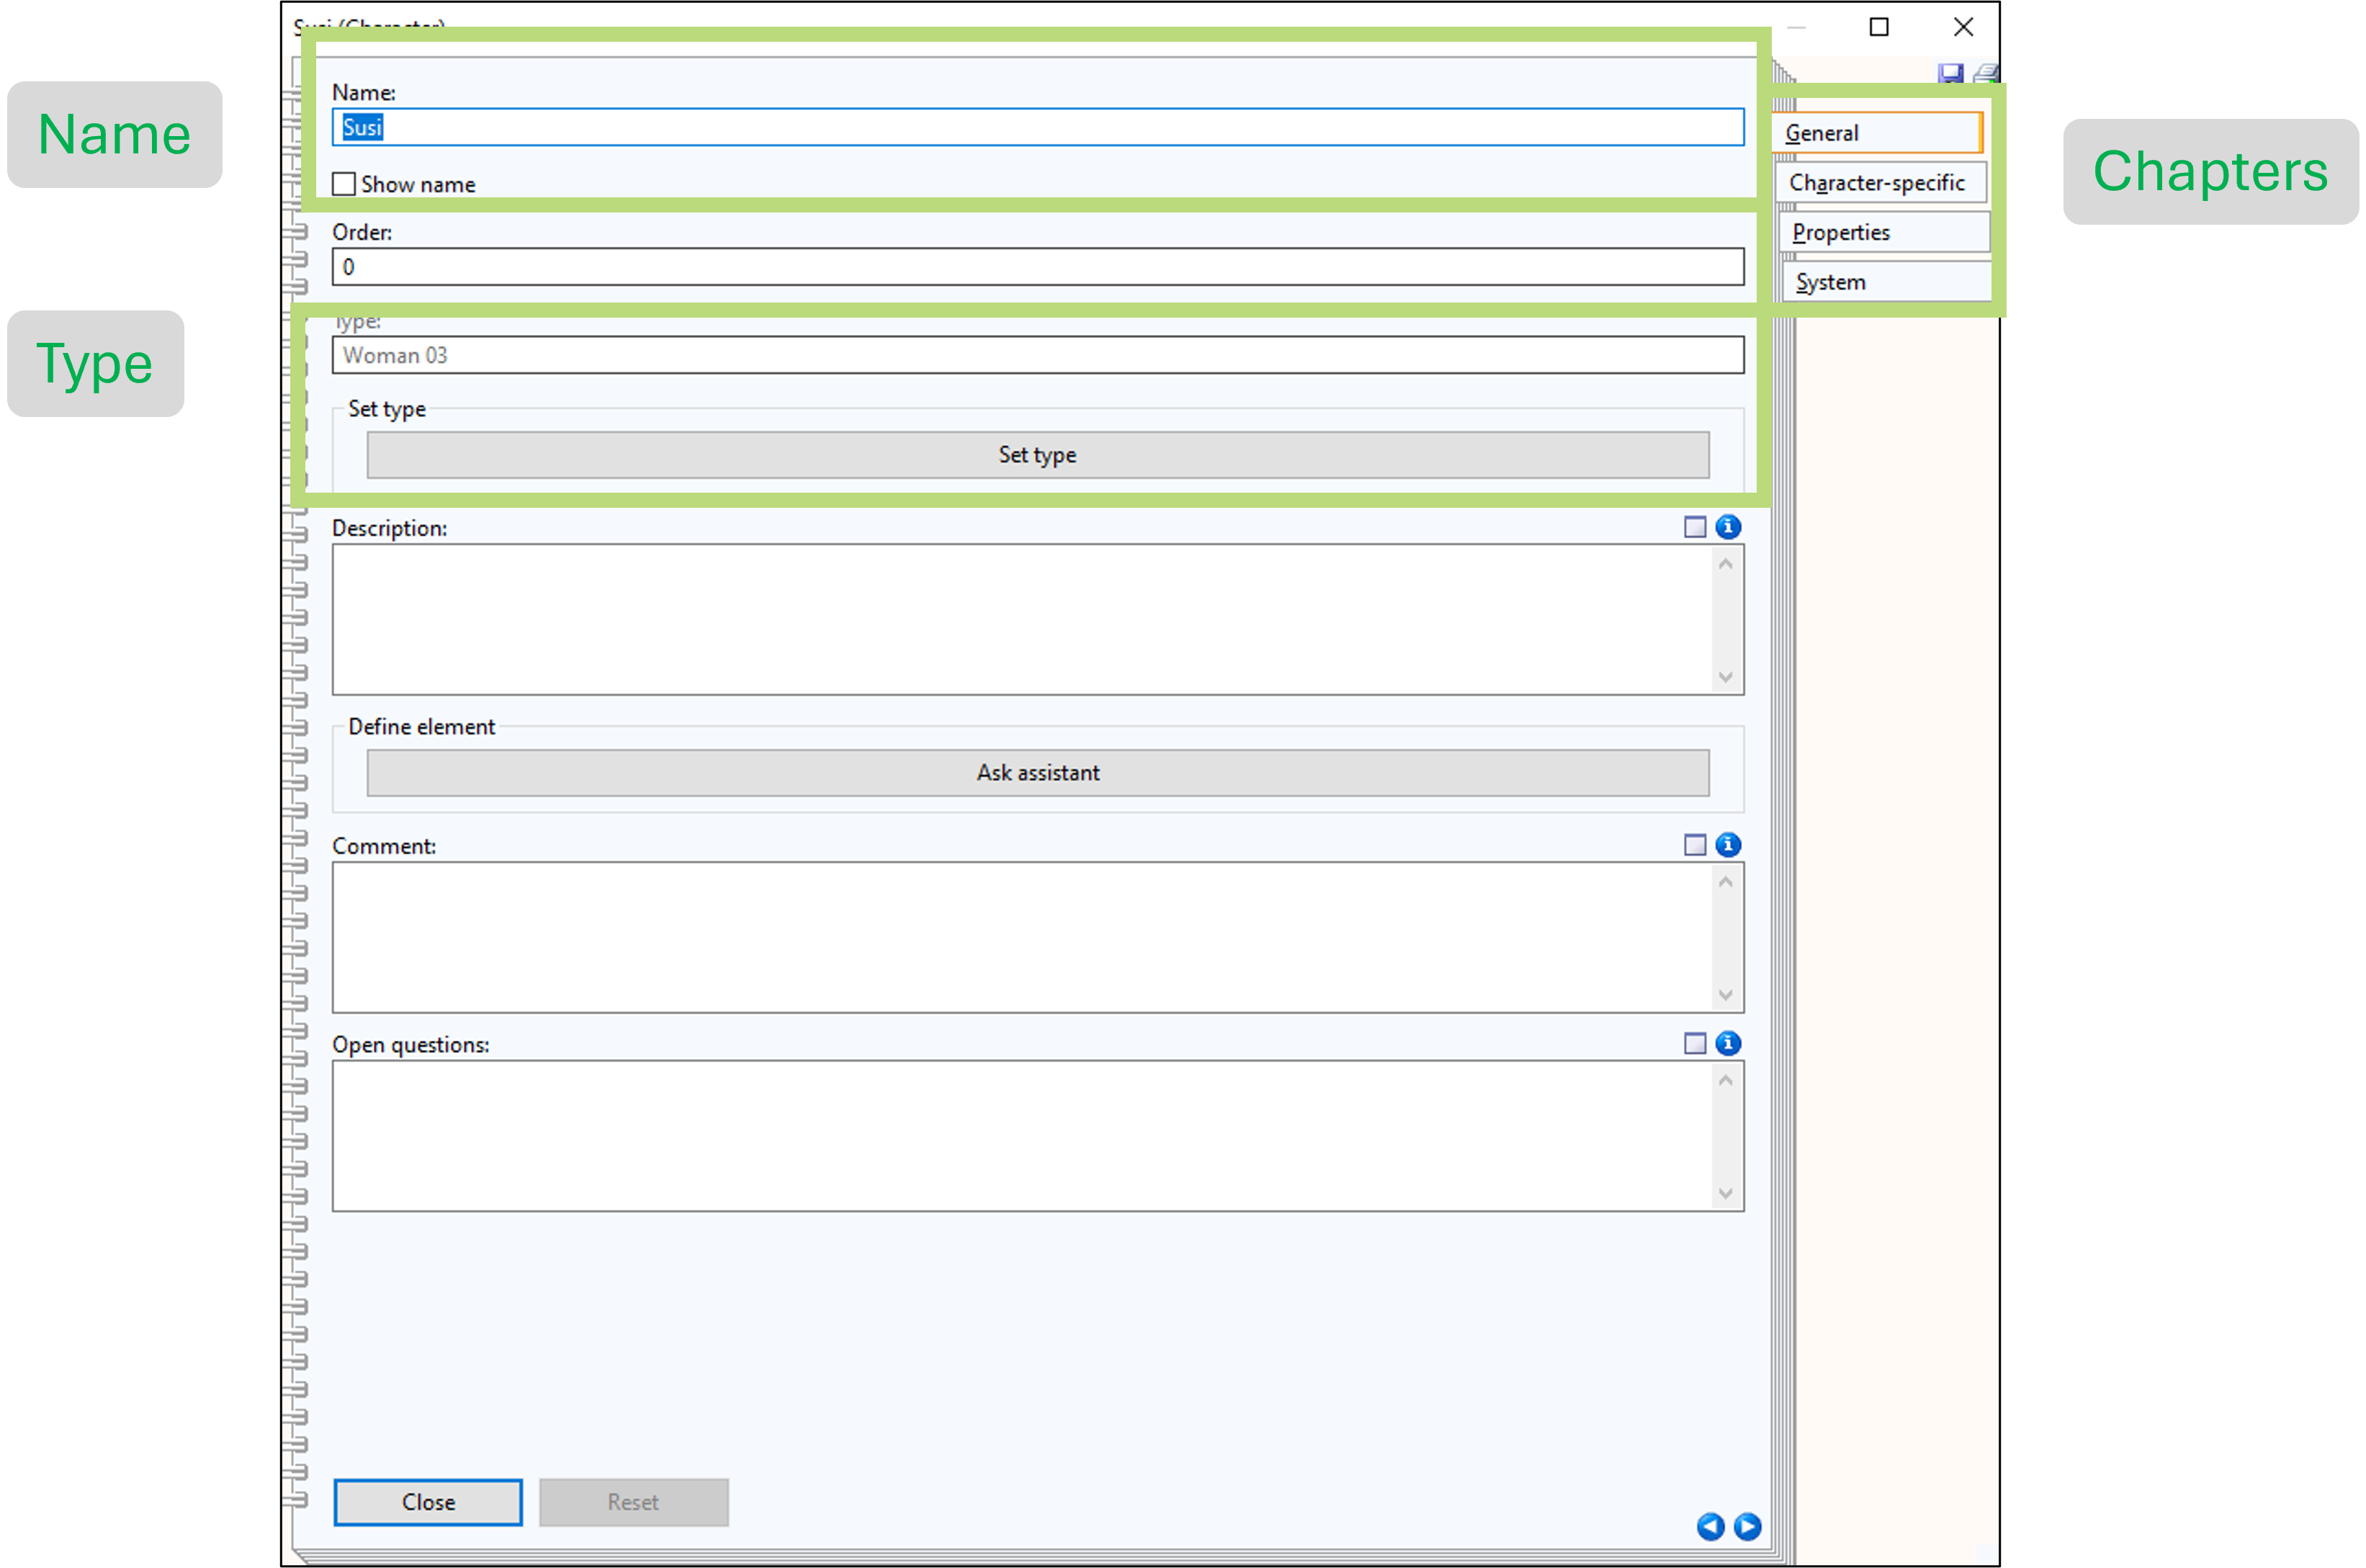
The main part of the notebook shows the available attributes, where two important ones are the Name and Type. Name is the identifier of the element, which must be unique in the model. By checking the Show name box, the string entered in the name attribute is shown in the model. Type defines the visual representation that is shown for the element. The type can be chosen by clicking on Set type. The other attributes are for adding additional textual information.
On the right side of the notebook the chapters are listed. A chapter is a group of attributes shown together:
- General: contains the attributes, which are the same for each element.
- Character-specific: contains the attribute defined within the Domain-specific library. The first part is the same as the name of teh element class, which is Character in the picture.
- Properties: contains a table where additional properties can be added to the specific element. Here key-value pairs can be saved.
- System: contains debugging information.
Managing the Elements in a Model
Each element in the model is its own object, which can be moved around using the mouse. Additionally, if an element is marked (by clicking once on it) it can be deleted by using Right-click--> Delete or by pressing the Del button.
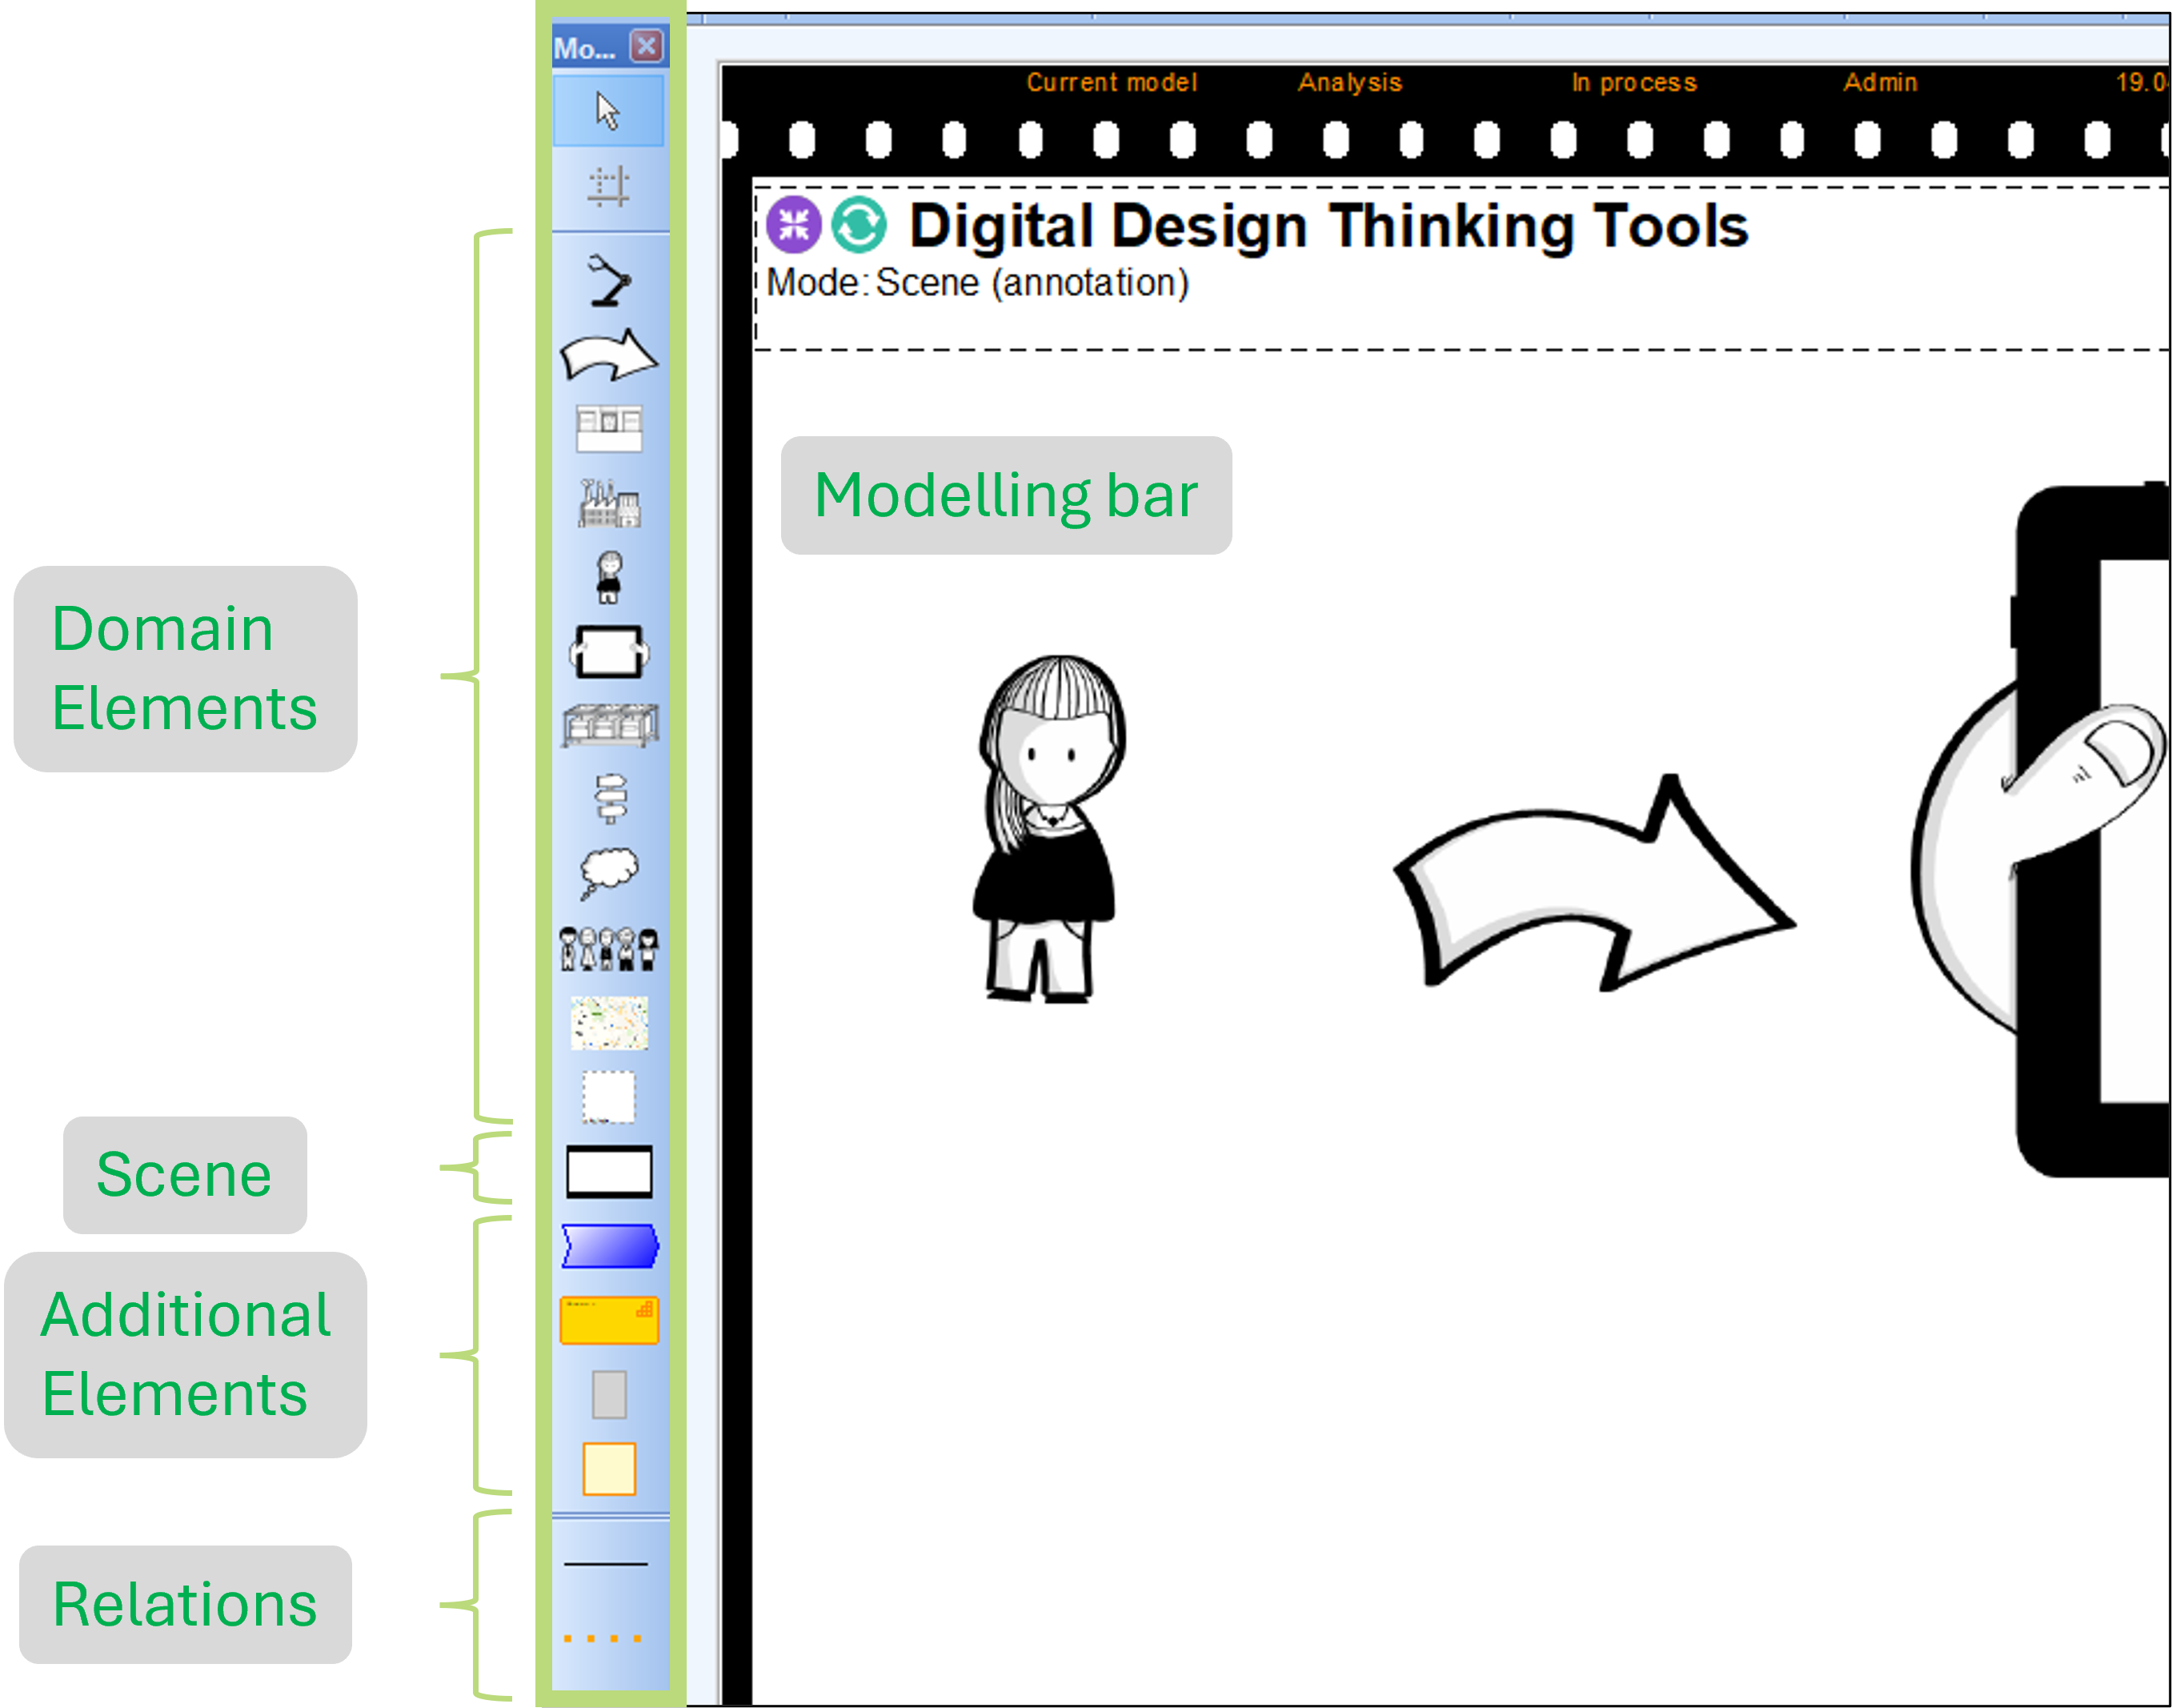
By using the model bar on the left side of the interface, new elements can be added to a model. Therefore, one must click on the element in the modelling bar and then click on the drawing area. If a Domain Element is created a window with all available types is shown. Here the type for the element can be chosen.
Scene objects can be used to create links to other models. Therefore, a scene element must be created and afterward the user can use the + symbol in the notebook by the attribute Referenced scene to add a link to another scene or storyboard.
Additional Elements are provide to add processes or capabilities to a scene, to provide context knowledge from the domain. Aggregation elements can be used to visually group elements in a scene. Last but not least, Note elements can be used to add textual notes to the model.
Relations can be used to visually link two elements together through a line or error. The notebook of an created relation allows to provide a name, which can be shown in the model and to define if relation should be interpreted as unidirectional or bidirectional.
Annotate Scenes with AI
The Scene2Model tool offers LLM-based AI support for annotating the created models. More information can be found under LLM Support