Simulation of Storyboards
This chapter explains how a storyboard can be simulated using the modelling tool functionality. Storyboards cannot only contain the different scenes and their logical sequence, but also control elements like start, stop and decisions. These can be used to simulate the storyboard.
Prerequisite:
- a Scene2Model Library is loaded
The picture below shows an example storyboard, containing one start, one end and one decision: 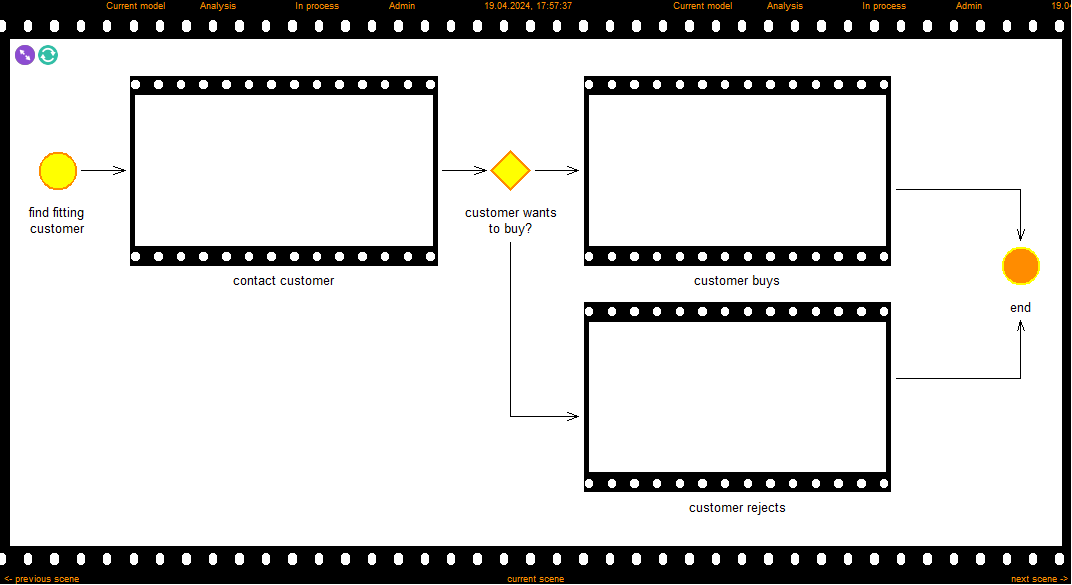
Preparation
(We want to create a storyboard with three scenes and one decision)
- Create the objects and connect them with
Subsequentrelation, so that the model looks like the picture above. - Add simulation data to the scene element
- Open the notebook (double-click the scene element)
- Change to the
Quantificationtab - Enter time
- Enter Cost
- repeat for all scenes
- Add transition probabilities to the decision, providing information how probable it is that the decision continues this path
- Open the notebook of the relation outgoing of the decision
- Change to the
Simulation settingstab - Add a comma value for the probability that this path is chosen after the decision, e.g., 0.7 or 0.4
- Add it a value to
Simulationto be used in thePath analysis - Add it a value to
Analytical evaluationto be used in theAnalytical evaluation
- Add it a value to
- Repeat for each outgoing relation
- Attention: The probabilities added to all the outgoing relations of one decision must be
1in sum. (e.g., one relation has 0.3 and the other 0.7)
Procedure for Path Analysis:
- Open
Simulationcomponent - Click
Path analysis - Choose the storyboard you want to simulate
- Click
Ok - The results of the Path analysis are shown
Procedure for Analytical Evaluation
- Open
Analysiscomponent - Click
Analytical Evaluation - Choose the storyboard you want to simulate
- Click
Ok - The results of the Analytical Evaluation are shown